So remember a while back when I gave you some sneaky peeks of a job I was doing? (Its
here if you didn't). Well I can finally tell you all about it, so no more guessing games...
Back at the end of January I started working for Zoe Brewer,
a very talented lady who has worked her way across television and styling to
now owning her own interior design business
My Interior Stylist.
Meeting with Zoe was probably one of my favourite interviews
ever. We met at her house where not only did I meet Zoe and get a good look at
her pink themed kitchen, but also her cute new kitten and lovely dog Suzie
joined us.
I was brought on board to assist Zoe with some interior
makes for a big interiors project with Lower Mill Estate located in the
Cotswold. Ill explain more about Lower Mill in my next few posts as its such a
beautiful place I wouldn’t want it to just be a short paragraph.
So interior makes. Looking over Zoe’s great mood boards on
our first meeting that you can see her explain
here. I got a very detailed look
at what she wanted to achieve with the project and also what she wanted from
me.
Zoe had a great idea to use materials from the land around
the estate, most predominately been logs.
Together using pinterest we were able to see how others had
used logs within the home, from tables, seats to interior features. Zoe had
some great pins, that you can see
here, which also inspired my own collection
for inspiration that you can see
here. Using these images I was able to get an
idea of what she wanted.
So I got to work on some testers….
So my first testers started out as a Christmas tree, which if like me you hate to see Christmas trees in with the rest of Christmas rubbish, this is a good idea for the future.
Using a hand saw I stripped the bark of all the branches and sanded it down. I used a electric sander, (kindly handed down to me from my dad) but using paper sand paper would work, just watch your hands.
After that I cut the log into three sections, all different in height for variance. I sanded down each end to remove any sharp edges and also to expose the gorgeous tree rings.
Once all sanded, I gave them a coating of white paint then choose some neutral colours to paint them. This way they would work within any colour scheme, especially within the interiors of the Lower Mill project.
As the bark was small and probably wouldn't make much of a seat or table, I decided to present these as church candle stands.
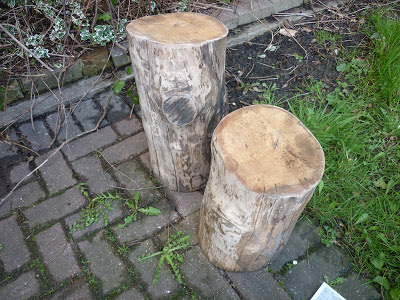
The second set of testers I went on the look out for some larger logs, finding some in the local park.
Here I am getting started on the stripping down or the bark and cutting the edges off.
(Cheese!!)
So once cut down to size, exactly the same process as above.
At this size they can easily be used as a seat or a table to rest your drink. When not been used, they just add a bit of colour to the garden.
These testers where not actually used for the Lower Mill project. The estate actually had onsite logs that during the project where painted and used for the apartments. Not only was there logs similar to above but Lower Mill actually has a family of beavers and logs that had been artistically gnawed by the beavers. Animal lover like me, have a read about the beavers
here.
So because the testers weren't needed for the project I got to keep them! They now sit pride place in my new home, the smaller ones lighting up the living room at night when we're trying to save money on electric and the larger for when we have summer garden parties, like below...
Can you see them? I know, I know, not great pictures but I think these guys appreciated them.
Thanks for reading everyone and I will tell you more about this project soon!
Elle xx


